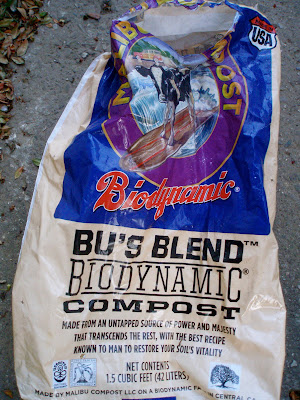
I've heard many times that the key to a successful garden is great soil. Good dirt is like a bank account- you have to keep making deposits. When I started the garden I had the misperception that once you buy good soil your garden for the rest of the garden's life. With some of the plants not thriving as I had hoped over the summer, decided it best to spend the last six weeks amending the soil and holding off on planting anything else until September. The whole process started with my friend Georgie helping me dig up all the garden beds a foot deep to break up the soil. It was not pretty.

hopefully won't have to buy too much more of this...

hopefully won't have to buy too much more of this...
Added this too and some blocks of coconut core for water retention along with worm castings- since everyone thinks they're the absolute ultimate for boosting your soil.

Kate gave me a great tip- City of Santa Barbara sells compost buckets for $40 at the dump.
:: algae and seaweed are great addition if you live by the sea
:: to start your compost, add some of a friend's compost (who you trust)- it will help speed up the process

Kate gave me a great tip- City of Santa Barbara sells compost buckets for $40 at the dump.
I was a little hesistant to start a compost since my last experience with composting was sullied by a stinky dirt pile that smelled like a garbage pit and was crawling with pests- it was my roomate's project and made me a skeptical composter ever since. However; since I've dropped way too much money on buying dirt, compost and other soil boosters- I decided to give it a run. Mine is still brewing- so far no big stink, rats, or major yuck. Here's some tips that helped me....
:: chop up everything small- it will compost faster. Don't throw big things in there because it will take too long to digest. I've heard of people even having a composting blender
:: algae and seaweed are great addition if you live by the sea
:: to start your compost, add some of a friend's compost (who you trust)- it will help speed up the process
:: it needs a diet of green (nitrogen-rich) & brown (carbon-rich) materials. GREEN includes: veggie/fruit scraps, rice, pasta, egg shells, tea bags, yard greens, hair (it has lots of nitrogen) BROWN: compostable napkins, paper, dried leaves, twigs, etc. Your compost should be 2 to 3 parts brown waste to 1 part green waste
:: DON'T compost sauces, meat, fish, dairy, weeds, citrus peels, ashes or any plants in your garden that are diseased or aren't growing well- you don't want to propogate that.
:: stir your compost-it needs oxygen. I use a small pitchfork. Add some water if it seems too dry- it should feel like a damp towel.
:: your compost will be ready anywhere from 6 wks to 6 months- depending on how great your mixture is. Put your bin in the sun to get the compost cooking- optimum temperature is 90-135 degrees F!
:: finished compost should be half of what you started with but denser and richer. Add finished compost to your garden 2-4 weeks before you plant to give it time to integrate with the soil.


